SketchUp to LayOut
- Description
- Curriculum
- FAQ
- Reviews

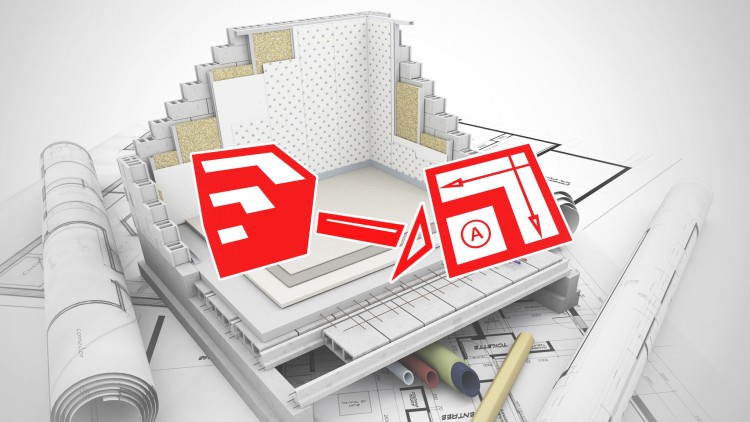
You know how to use SketchUp to create 3D models of your projects, but you need to create a 2D presentation of your model in order to communicate your design to other people. With SketchUp Pro, you have the ultimate tool for creating just that; LayOut.
LayOut is the companion program that comes with SketchUp Pro. It takes your 3D model and creates 2D snapshots of your model and places them onto "pages" so you can add dimensions, annotations, and other information in order to create a complete set of construction documents.
This course gives you a complete introduction to LayOut, teaching you all the basics you need to know in order to create a presentation of your model. In addition, you'll learn how to prepare your SketchUp model for LayOut. Have complete control over the look of you LayOut viewports by properly organizing your SketchUp model and creating scenes.
After learning how to create a LayOut document, you'll also learn advanced techniques in SketchUp for creating section cuts, hatch patterns, and poche effects.
This video course includes the SketchUp to LayOut PDF ebook which has all of the lessons from this video course, and other valuable tutorials which you can follow. You'll also get the CAD hatch material library and style library so you can apply traditional hatch patterns to your model.
By the end of this course, you'll have a complete understanding of how to create a SketchUp model specifically for LayOut, as well as how to create a full set of construction documents inside LayOut.
-
1Introduction
Introduction
An overview of the SketchUp to LayOut video course, as well as instructions on how to follow along the course and download the bonus material.
-
2SketchUp to LayOut (PDF)
Download the SketchUp to LayOut PDF, along with the sample files referenced in the book and this video course.
-
3SketchUp CAD Hatch Materials
Download the SketchUp to LayOut CAD hatch materials library and install them on your computer. See instructions below to learn how to install for Windows and Mac.
-
4SketchUp CAD Styles
Download the SketchUp to LayOut CAD styles and install them on your computer. See the video on "Auto-scale hatching" to learn how to use these special styles to apply a hatch pattern to your model. See instructions below to install them on Windows or Mac.
-
5Planning
Planning
Before you can create a LayOut document, you need to create a model in SketchUp. Take some time to think about what you want the end result to look like, so you know what level of detail to model at in SketchUp. Proper organization with groups and components and layer assignment is critical when creating a model for LayOut.
-
6Groups & components
Groups & Components
Organizing your model into groups and components is absolutely critical to successfully organize your model. They also allow you to create logical sets of objects that can be assigned to layers, so you can easily control object visibility. Each primitive shape, parts of an assembly, and all similar objects should be grouped in your model.
-
7SketchUp Layers
SketchUp Layers
Once you've assigned groups and components throughout your model, you can then assign them to different layers. I define my layers into different categories, such as "location layers", and "objects layers". Thinking of layers in this way helps me create a well organized model that I have complete control over when preparing it for LayOut.
-
8Workflow overview
Workflow Overview
As a rule of thumb, anything that represents a physical object should be modeled in SketchUp, and all annotations and dimensions should be created in LayOut. You create a well organized model in SketchUp, create scenes for each viewport you want to create in LayOut, then import those scenes into LayOut and then add all your annotations.
-
9Visualizing Scene Properties
Visualizing Scene Properties
Scenes provide a powerful way for you to configure the look of your model and save those properties to be recalled later. We'll assign scenes to viewports in LayOut, so it's important to understand exactly what properties scenes can save. This video will help you visualize those properties.
-
10Creating Scenes
Creating Scenes
The Scenes window allows you to create and delete scenes, edit existing ones, and navigate through them within your model. You also have the ability to chose which properties you'd like the scene to save.
-
11Creating Scenes for LayOut
Creating Scenes for LayOut
Follow this five step checklist for creating scenes, and you'll have complete control over the look of your model for each scene you create for LayOut viewports. You'll want to think about visible objects, foreground depth, background depth, camera settings, and style.
-
12Section Cuts
Section Cuts
One way to define a foreground depth is to use a section cut. SketchUp has a special tool that inserts a section plane into your model that slices right through it. Anything behind the section plane becomes invisible, so it is a great way to control what you see in the scene. You can also align the camera perfectly with a section plane in your model.
-
13Clipping Planes
Clipping Planes
Another way to add a foreground depth to your model is to define a clipping plane. Clipping planes are created using the position camera tool, and must be done in parallel perspective mode. But they are a very clean way to define a foreground depth because unlike section planes, they do not add any additional objects to your model.
-
14Fog
Fog
You can use fog to make your model fade out into the distance, or to exaggerate depth in your model. But it is also a great way to define a sharp background depth too. Although, this will only work if you are using raster mode on your viewports in LayOut, the fog settings give you fine control over the look of fog in your model.
-
15What are SketchUp Styles?
What are SketchUp Styles?
Styles allow you to save the visual properties of your model. Things like edge style and face style affect how your model is rendered, and can make your model look dramatically different. Styles can be a saved property of a scene, so you should assign a style to your model every time you create a scene.
-
16Customizing Styles
Customizing Styles
All of the properties of style can be edited from the Edit tab in the Styles window. You can also change some of the style properties from various menus and toolbars within SketchUp, so just make sure you save any changes you've made if you'd like them to be saved in a style.
-
17Introduction to LayOut
Introduction to LayOut
Download the sample table SketchUp model to follow along with this portion of the video course.
-
18New Document
Opening LayOut for the first time.
In this video, you'll open LayOut and select a template to base your new document off of. Although there are many different templates that include preconfigured elements such as titleblocks, we're going to start off with a blank page for our first document.
Once we've successfully created our new document, we'll jump right in by inserting a SketchUp model onto the page.
-
19Selecting/Moving Objects
Manipulating Objects in LayOut
Using the Select tool, you can resize objects in LayOut. Just click on an object to select it. You'll notice a number of blue arrows around the object which you can click and drag to resize the selected object.
The Select tool also doubles as a Move tool. By clicking and dragging an object you can move it around the page. By holding down the CTRL key with moving, you can create copies of objects.
-
20Model Space
Entering Model Space
One of the unique features of LayOut is that it allows you to manipulate the camera position of the viewport in order to gain a different perspective of the model. In Model Space, you have access to the orbit, pan, zoom, and other tools to help you create the perspective you want.
-
21Preset Viewport Perspectives
Preset Viewport Perspectives
LayOut has a number of preset camera views that you can set your viewports to. This allows you to create perfectly aligned views to common perspectives. You can also toggle orthographic mode.
Using these settings gives you the ability to fine tune the look of your viewport directly from LayOut.
-
22Changing the Style of your viewport
Changing the Style of Your Viewport
LayOut gives you plenty of tools to control the look of your viewports. You can toggle shadows, fog, and assign SketchUp styles to your viewports. Although you don't have as much control over the look of your model from inside LayOut, these controls can sometimes give you the quick changes you need to get the look you want.
We'll also go over how to create a multiple selection.
-
23Viewport Render settings
Viewport Render Settings
LayOut gives you three different rendering modes for your viewports. Raster, Hybrid, and Vector rendering modes each look different, and some take more processing power from your computer in order to render.
-
24Background and Z-order
Background & Z-order
Objects that are inserted into LayOut will be stacked on top of each other in the order in which they are inserted. This is called the Z-order. You can shuffle the Z-order of objects so they stack in a different order within a layer.
You can also toggle the background of viewports so only the model is visible.
-
25The SketchUp Link
The SketchUp Link
One of the most powerful features of LayOut is its ability to remain dynamically linked to your SketchUp model. Any changes made to your model can be automatically updated in your LayOut viewports.
-
26Sending SketchUp scenes to LayOut
Sending SketchUp Scenes to LayOut
An even more powerful way to control the look of your viewports in LayOut is to create scenes in SketchUp ahead of time that you use to assign to the viewports in LayOut.
-
27Layers
Layers
Layers add an additional level of organization to your document pages. They also let you control visibility of objects, and let you lock layers so you don't accidentally select or change objects.
-
28Grid
Grid
LayOut gives you a tool that can help you precisely place objects on your pages. The grid can act as a simple visual aid, or you can enable "grid snap" to snap to grid intersections on your pages.
-
29Titleblock Border (Rectangle tool)
Titleblock Border
In this video, you'll learn how to use the rectangle tool to draw a titleblock border around the page. You'll also be introduced to the Shape Style panel in order to change the border stroke and color.
-
30Project Info Area (Line tool)
Project Info Area (Line Tool)
With the Line tool, we'll create an area at the bottom of the page to display our project information. This video will give you an overview of all the different ways you can use the Line tool to create straight of curved line segments. We'll also see how you can sample properties from other shapes using the Style tool to configure tools before placing objects on your page.
-
31Project Info Text (Text tool)
Project Info Text (Text tool)
Using the Text tool, we'll place some basic information in the project info area. This time, configuring the tool ahead of time, I'll show you an alternative way to set the properties of an object in LayOut.
-
32Label Tool
Label Tool
Add text leaders using the Label tool. Since labels are made up of both text and a line segment, we'll use multiple panels in order to change the properties of the them.
-
33Symbols/Annotations
Symbols/Annotations
Using the shape tools in LayOut, you can create an endless variety of symbols and annotations for your project.
-
34Aligning objects
Aligning Objects
If you'd like to perfectly align objects in LayOut, you can do that using the alignment tools. In this video we'll look at a couple of examples on how you can align multiple objects, and where to access those tools in multiple locations.
-
35Creating Groups
Groups
To make it easier to select multiple objects at once, you can make them into a group. Groups allow you to select and manipulate multiple objects at once.
-
36Scrapbooks
Scrapbooks
There are likely to be objects that you'll want to use over and over throughout many of your projects. Scrapbooks provide a way for you to create a library of frequently used objects to quickly place in your document. LayOut comes with a number of scrapbooks built-in.
-
37Custom Scrapbooks
Custom Scrapbooks
Aside from using the scrapbooks included with LayOut, you can also edit them or create your own.
-
38Sampling from Scrapbook
Sampling Scrapbooks
Scrapbooks allow you to place objects into your document, but they also provide the ability to sample styles too. Create a scrapbook with your preferred styles so that you can sample them in each of your projects.
-
39Linear Dimensions
Linear Dimensions
LayOut has a powerful set of dimension tools that let you place accurately scaled dimensions of your SketchUp model. Linear dimensions can be set to Auto-Scale to automatically infer the scale the viewport is set at.
-
40Angular Dimensions
Angular Dimensions
Measure angles using the Angular Dimension tool. You can measure both inside or outside corner angles using this tool.
-
41Advanced Dimensions
Advanced Dimensions
Instead of using the scale handles on the dimension, it's best to double click a dimension to manipulate the various anchor points directly.
-
42Pages/Shared Layers
Pages/Shared Layers
Let's add another page to our document, and demonstrate how to shared objects with multiple pages using a special type of layer called a shared layer. Shared layers are useful for things like titleblock elements that are identical on multiple pages.
-
43Auto-Text Tags
Auto-Text Tags
Auto-Text was introduced as a new feature in 2014, and it allows you to place text tags that dynamically display text within your document. For example, using the <PageNumber> Auto-Text tag, the text will display the correct page number depending upon which page it is displayed on.
-
44Export as PDF
Export as PDF
Export your LayOut project as a multi-page PDF document using the built-in PDF exporter.
-
45Export as DWG
Export as DWG
Export your LayOut document as separate DWG files. You have control over the scale of the export, layers, as well as which AutoCAD version to be compatible with.
-
46Export as Images
Export as Images
Export your LayOut pages as high resolution images.
-
47Presentation mode
Presentation Mode
Present your LayOut document using the built in presentation mode. In presentation mode, you'll enter full screen, and will be able to navigate through your document like a slideshow. You can also interact with your viewports by jumping into model space, or by adding notations with the freehand tool.
-
48Solid Black Poché
Solid Black Poche
Use this effect to create the illusion of a solid black fill through a section cut. Achieve this by painting all back faces black using the paint bucket tool or by using a custom style.
-
49Parallel Perspective Hatching
Parallel Perspective Hatching
Paint the bottom inside face of your model and align your model in top view while in parallel perspective to create this effect. Useful for section cuts of walls in a floor plan perspective.
-
50Textured Poché Fills
Textured Poche Fills
Use the Create Groups from Slice command to generate edges at a section cut. Fill in faces at those edges and paint them any material to create a real poche that can be viewed from any angle.
-
51SectionCutFace Plugin
SectionCutFace Plugin
The free SectionCutFace plugin saves you time when creating faces from section cuts. Learn where to downlaod and how to use this valuable plugin.
-
52Auto-Scaling Hatching
Auto-Scaling Hatching
This advanced technique uses styles to apply a hatch watermark mask over your entire model to create a hatch pattern. This method only works if you are able to isolate objects in your model using layers, because it applies the hatch over the entire model.
-
53Stacking Viewports
Stacking Viewports
You can create composite viewports by stacking them on top of each other inside LayOut. The key to this is to save two or more scenes from the same camera perspective, but with different objects visible.
-
54Pasting Linework into LayOut
Pasting Linework into LayOut
You can copy and paste objects from SketchUp into LayOut. This is useful for copying linework generated from a section cut and stacking it on top of a viewport in LayOut.
-
55Transparency Between Viewports
Transparency Between Viewports
Although there is no way to adjust the transparency of viewports, there is a way to mask viewports. Use fills and adjust the opacity of them to make a viewport appear to be fading into the page below.
-
56Patterns & Pattern Masks
Patterns & Pattern Masks
The pattern tool can create a pattern fill inside of a shape in LayOut, or you can use it to create a mask effect on top of other objects.


Social Network