SketchUp for Woodworkers: bring your designs to life in 3D
- Description
- Curriculum
- FAQ
- Reviews

Let me teach you the basic methods I use in SketchUp as a professional illustrator and designer with 20 years experience in woodworking magazines!
I have drawn thousands of woodworking projects for magazines in the UK, US and Europe, and currently illustrate 2 top UK titles, Furniture and Cabinetmaking and Woodworking Crafts.
SketchUp has been a big part of this process. It is a great drawing program, and although its hard to find, you can still download the FREE version called SketchUp Make.
Just in case you are having trouble finding Sketch Make, the free version you can install on your computer, search for SketchUp Make in Google and follow the instructions. This is a different and much more powerful version of SketchUp to the online browser based SketchUp Free.
Learning the basic tools is just the start though. You can save yourself so much time and effort by using a few simple methods I show you in the course.
Using these techniques, you will find it much easier to design and draw your own projects!
Drawing in 3D can be huge fun, seeing something you have imagined coming to life.
It can also be a bit daunting at first, and without a clear structure to guide you, its possible to get a bit lost. This is why you need my course.
(Update, February 2018: link for students who want to learn basics first added)
-
1Welcome to SketchUp for Woodworkers
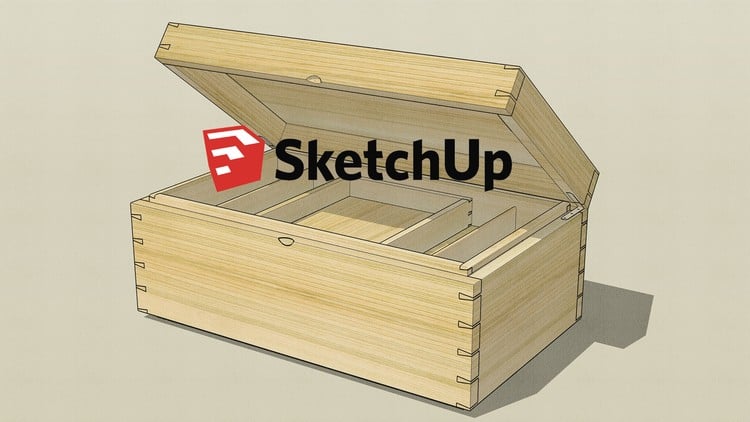
This lecture is to welcome new students, and to give a quick introduction to some of the main features of the course, which is divided into 3 main parts: Design and Drawing; Build; and Output and Presentation. The project in the Build section is a small toolbox, designed and made originally by the British furniture maker David Barron,.
-
2Design Ideas; doing a bit research before you start
SketchUp is a brilliant tool to help you design your own woodworking projects, but before putting (virtual) pen to paper, it is always worth taking a look at how other makers have gone about tackling similar designs.
-
3Free basic SketchUp course available here...
-
4Viewing your model
Being able to move around the screen quickly and easily is a big part of the drawing and design process. This lecture has tips on how to do this more effectively.
-
5Components and Groups
SketchUp has a tendency to stick lines and faces together, so to create separate objects in a model we need to make them into either a group or a component. This lecture discusses which is best for woodworking projects
-
6Positioning Objects in SketchUp
Another essential skill when you are drawing in 3D is the ability to position the parts of your model quickly and accurately. This lecture will help you do this.
-
7Changing Sizes
-
8Changing Colour and Number
Another great feature of SketchUp is it's ability to quickly change the appearance of models. This can include changes in colour and also applying wood grain. Additionally, it is easy to create and edit Arrays, which are regular, multiple copies of objects, to test out spacing and frequency in your design.
-
9Keyboard shortcuts; a few of the most popular ones which can save lots of time.
-
10Building a toolbox: Introduction
A quick run through of the construction of the toolbox which features in the build section of the course.
-
11Outline Box; start the design process in SketchUp with overall shape and size
SketchUp is perfect for quickly evaluating different design ideas. Its very quick to draw outlines of things, but even better than that, making edits to those initial ideas is really easy! Once you are happy with the overall design idea, you can start to refine the details, and then use this to build the components!
There is a PDF file to download with this lecture, which has all the dimensions of the toolbox on it, as well as an annotated 3D exploded perspective.
-
12Use your outline design as a template to start the construction of details
Building the toolbox in SketchUp is similar in many ways to actually constructing it in the workshop, in that you can use finished components to size and add details to other components. This also applies to your outline design, which you can begin to use as a template to construct the outer carcass of the toolbox. Also learn how and why using Layers is so important when using the in situ method of building a model.
-
13Front and Side Worksheet
A summary of the "Use your outline design as a template" video lecture, using text and images.
-
14Setting up dovetails is easy and adds realistic detail to your outline design
Learn how to set up dovetail in SketchUp, using the Tape measure tool to create guidelines, and the Move tool to create an array of the dovetails.
-
15Set Up Dovetails Worksheet
A summary of the "Setting up dovetails" video lecture, using text and images.
-
16Cutting dovetails; if only it was this quick and easy in the workshop!
Use the outlines of the dovetails you have already drawn to cut them in the front and side components. Use Flip Along to speed up the drawing process.
-
17Cutting Dovetails Worksheet
-
18Marking out the sockets; get out the virtual pencil to finish your dovetails
Its easy to model things in SketchUp by using bits and pieces of one component to make another. Learn how in this lecture!
-
19Marking Out Worksheet
-
20Making the top: create a top with a tongue using the Push/Pull tool
Using the side and front of the toolbox to size the top with the Rectangle tool, and the Push/Pull tool to create thickness, its a simple job to then edit the top and create a tongue around the bottom edge.
-
21Making the Top Worksheet
-
22Cutting the top grooves by drawing rectangles on the top and pasting in place
There are lots of ways to do the same thing in SketchUp, and here I show you the first method to use for cutting out grooves using a component, the top, that you have already drawn.
-
23Cutting Top Grooves Worksheet
-
24Cutting the bottom grooves using a great mirroring technique
Learn how easy it is to "mirror" things from one part of a model to another, and create new features, using Flip Along. This really is a great time saver.
-
25Cutting Bottom Grooves Worksheet
-
26Quiz 3; editing components
-
27Make the bottom of the toolbox in one easy move and edit!
Following the basic first principle of computer drawing, which is: draw something once and use it again and again, its a simple thing to make a bottom out of a top with a bit of editing! Save even more time and effort here.
-
28Creating the Bottom Worksheet
-
29Splitting the side or get the virtual saw out
Unfortunately no virtual saws were found for this lecture, so instead I edited the side to create two parts, a top and bottom, to start creating the lid and base of the toolbox.
-
30Splitting the Side Worksheet
-
31Splitting the front or a bit more cutting with the virtual saw!
Copying the process of splitting the side, and this time you're a bit more on your own, and instead of a voiceover, there's some background music ( and captions of course)!.
-
32Splitting the Front Worksheet
-
33Creating the linings; more drawing once, using twice
This lecture wraps up the construction of the main part of the toolbox with the construction of a couple of mitred linings. Sizing things is easy from your model, and use the Clipboard again here to save a bit more drawing time.
-
34Creating the Linings Worksheet
-
35Main tray side and front: streamlining the Copy and Flip techniques
Computer drawing of any kind is all about looking or thinking ahead, and asking yourself if you can re-use this bit of drawing somewhere, or do you need to draw this whole piece...so a simple thing like only drawing half the tray sides is an important part of learning to draw efficiently!
-
36Main tray dovetails plus a few keyboard shortcuts
This is the second set of dovetails you construct in the course, so this lecture focuses on a few extra things, like keyboard shortcuts, and also gives you a rest from constant talking, with a bit of music!
-
37Main tray bottom and grooves: introducing the powerful Intersect Faces option
Introducing an important new technique in this lecture; Intersect Faces....which is a powerful modelling tool, similar to some of the solid modelling tools in other software. It's possible to create some very complex shapes with this tool in SketchUp, although I'm just starting with a couple of grooves in the tray sides here!
-
38Adding dividers, and what on earth is a tangent arc?
In this lecture I'm introducing you to tangent arcs...okay, I'm not really sure what these are either (I'm kidding, but its tricky defining them!) Sufficient to say that they are a great tool to use, once you know how (and what they are!)
-
39Small tray sides and building a grid with guidelines
This is a basic exercise in layout using guidelines to create a grid, and then the sides of the small tray. I also have to own up to not doing this as efficiently as I could have done, so maybe you can do better!
-
40Model the small tray dovetails
Yet more dovetails! One small variation is the use of the Midpoint to establish the inner lines, as there are only two tails here. Its really a good revision exercise though, and set to music with captions, since I'm hopeful that you won't need me telling you what to do by this point.
-
41Small tray bottom and grooves, finishing (almost) the construction
Finishing off the small tray (almost) by completing the sides and adding the bottom and grooves. I also discuss the advantages of window selection versus triple clicking, fascinating stuff!
-
42Holes in the main tray ends
This lecture includes an alternative method of editing a component, in situations where hiding lots of stuff isn't necessary or desirable. Very useful to remember this one, and I use it again when chamfering the top.
-
43Filling in the jigsaw pieces
The end (nearly) of all your hard work, where the finished toolbox takes shape. Half-built until now, the missing components are filled in by copying and flipping existing ones.
-
44There's more than one way to chamfer a top. Two in fact.
Hopefully, showing you more than one way to put a small chamfer on the top won't be confusing, but will instead add to your growing range of drawing techniques.
-
45Rounding over the outer edges of the main tray
Its pretty easy to create a roundover in SketchUp, and its even possible to do two at the same time. How? Well, you see the answer in this lecture, using the Follow Me tool.
-
46Starting the finger pull
This doesn't sound like a big deal, making a finger pull for the toolbox. Well, its actually the trickiest bit of modelling in the whole thing, and these two lectures take you through a range of techniques which are pretty useful, and will get you out of trouble when all else fails. I also show you the really surprising and amazing SCALE trick in SketchUp. I don't know why it works, but it does, time after time!
-
47Finishing the finger pull
Really using the Intersect Faces command to its maximum effect in this final bit of model building.
-
48Styles - An overview of setting up and editing styles
-
49Styles - Lines (or Edges as SketchUp calls them)
Looking at ways you can add non-standard lines or edges to your model using the Mix tab in the Styles editor
-
50Applying materials
An introduction to applying materials to models and how to edit them to suit the size and scale of your project. There are also some graduated fill textures to download with this lecture.
-
51Working with wood grain
A look at how to add and edit wood grain to your model. This lecture includes some sample wood grain JPEGs for you to download and use yourself.
-
52Scenes; how to use scenes to display your model, including animation
Scenes are a great way to save individual settings and can be used to create different image alternatives to display your model, but can also be used to create very effective animations which can be uploaded to YouTube, a website or any other platform.
-
53Adding Dimensions
This lecture outlines how to make the most of SketchUp dimensions, including setting up elevation type drawings and linking them to scenes.
-
54Output: some of the great alternative ways to present and share your model
SketchUp has all sorts of great presentation tools and this lecture looks at the best of them, from PDF prints of dimensioned views to animations of saved scenes which can be turned into Mp4 files and uploaded to YouTube.


Social Network