Practical AutoLISP Programming - Beginner to Advanced
- Description
- Curriculum
- FAQ
- Reviews

You will understand and learn AutoLISP and how it is being used in AutoCAD
You will have a deeper understanding of AutoCAD objects and how they can be manipulated by AutoLISP without even touching them.
You will learn how to create your own AutoCAD Shortcut Commands and Macros
You will be able to create simple to medium complexity Programs from scratch with the help of several exercises to reinforce what you learn
By the end of this course, you should be able to develop your own programs to increase your productivity. For example:
start automating repetitive tasks
develop programs that extracts drawing information and many more…
And most importantly, you will become an AutoLISP programmer
-
1Introduction
Discuss the objectives of the course as well as provide overview of AutoLISP Programming and its benefits
-
2Course Outline
We will discuss the Course Outline by going through each of the Topics in the list
-
3Introduction to AutoLISP
We will discuss about how AutoLISP is being used in AutoCAD.We will identify what type of Programming Language it is and what it can do.
-
4Who is this Course for?
We will identify who should learn AutoLISP and why? We will also identify what are the benefits for each type of user.
-
5What will I Learn?
We will determine the things that you will gain by taking this course.
-
6About the Author
You will get to know who the Author is and his background as an IT Professional.
-
7Why Learn AutoLISP?
Further information is provided why you should learn and become an AutoLISP Programmer.
-
8Tools
We will identify the Tools that we will use in this course.
-
9Create Zoom Command Macros
We will learn how to create our own AutoCAD Commands or Macros using the Zoom Command.
-
10Create Layer Command Macros
We will learn how to create our own AutoCAD Commands or Macros using the Layer Command.
-
11Create Insert Command Macros
We will learn how to create our own AutoCAD Commands or Macros using the Insert Command.
-
12Create Audit Commands
We will learn how to create our own Audit Macros.
-
14Understanding AutoLISP Variables
We will go through different ways to create variables and assign values to them. Also, we will identify what are the AutoLISP's predetermined variables that we should not be changing.
-
15Using Variables in a Real World Program - Part1
We will create 2 real world simple programs by calculating the values of the variables.
-
16Using Variables in a Real World Program - Part 2
We will create simple programs to create new Layers based on the values stored in the variables.
-
17Using Variables in a Real World Program - Part 3
We will create simple programs by using the Pause reserved word (or pre-dertermined AutoLISP variable) by creating a Line.
-
18Using Variables in a Real World Program - Part 4
We will create few more programs to demonstrate the use of predefined AutoLISP variable T by using it in a while loop.
-
19Math Functions in Theory
We will discuss most of the commonly used Math Functions in AutoLISP with the proper syntax. You will also find the complete reference for all the Math Functions should you need it in your development.
-
20Math Functions by Example
We will further reinforce our learning with Math Functions by creating sample programs using the math functions. We will be creating useful conversion programs.
-
21List Functions Theory - Part 1
We will discuss the List functions such as "car", "cdr" , "cadr" , "caddr" , "caar" , "cddr".
-
22CAR Function - Demo
We'll see how CAR function works in action.
-
23CDR Function - Demo
We'll see how CDR function works in action.
-
24CADR Function - Demo
We'll see how CADR function works in action.
-
25CADDR Function - Demo
We'll see how CADDR function works in action.
-
26CAAR Function - Demo
We'll see how CAAR function works in action.
-
27CDDR Function - Demo
We'll see how CDDR function works in action.
-
28List Functions Theory - Part 2
We'll discuss more List Functions such as "list", "cons", "nth", and "foreach".
-
29list Function - Demo
We will try creating Lists using the "list" function and see how it works.
-
30cons Function - Demo
We will see how "cons" Function works in action.
-
31nth Function - Demo
We will see how "nth" function works in action.
-
32Foreach Function - Demo
We will see how foreach function weorks in AutoCAD
-
33List Functions Theory - Part 3
We'll discuss more List Functions such as "assoc", "subst", "last", and "reverse".
-
34Assoc Function - Demo
We'll further explore Assoc function by retrieving each of the Line Definition Data.
-
35Subst Function - Demo
Subst function in action. We will substitute the layer of an Line entity through the Definition Data.
-
36Last Function - Demo
We'll see how Last Function works by getting the last item in the list from the Line Definition Data.
-
37Reverse Function - Demo
We will see how reverse function works by using it in the Line Definition Data and reversing the order of the list.
-
38User Input Functions Theory - Part 1
In this part 1 of the lecture, we will learn the following User Input Functions: getpoint, getint, getstring, getreal
-
39User Input Functions Theory - Part 2
In this part 2 of the lecture, we will learn the following User Input Functions: getdist, getcorner, getangle, getkword
-
40GetPoint Function - Demo
We will see how GetPoint function works in AutoCAD by drawing a line based on the points picked by the user from the GetPoint function.
-
41GetInt Function - Demo
We will try GetInt Function in AutoCAD and see how it works.
-
42GetString Function - Demo
Getstring is used to capture user's input. We will see how it works by setting a layer as a current layer based on the value specified by the user.
-
43GetReal Function - Demo
GetReal, as the name implies accepts a Real (or decimal) number. We will see how this works in action.
-
44GetDist Function - Demo
We will try many variations of GetDist function and see and understand how they work in AutoCAD.
-
45GetCorner Function - Demo
In this demo, we will draw a rectangle based on the corner point that we get from the GetCorner function.
-
46GetAngle Function - Demo
We will apply the GetAngle function by creating a simple program to draw a text based on the angle specified.
-
47GetKword Function - Demo
We will use GetKword function in a simple program by giving the user the Yes/No option to delete the object.
-
48Object Handling Functions - Theory
We will discuss all the Object Handling functions and have a good understanding of it.
-
49Entsel Function - Demo
We will see how entsel work in AutoCAD by selecting a Line object and selecting only the point or the entity name.
-
50Entnext Function - Demo
We will use the entnext function by going through the entire entities in the drawing.
-
51Entlast Function - Demo
We will retrieve the last entity in the drawing by using the function entlast.
-
52Entget Function - Demo
How does AutoCAD stores the Definition Data of the Objects. All of it will be revealed when we use Entget function in the drawing.
-
53Object Handling Functions - Exercises
Try finishing all the exercises to test your knowledge and understanding of the Object Handling Functions in AutoLISP.
-
54Object Handling Functions - Solutions to Exercises
Let's now compare your code to the Solutions provided.
-
55Selection Sets - Theory
We will cover all the Selection Sets Functions and understand how each one works and how to apply them in the code.
-
56Ssget Function - Demo
We will see how ssget function works and trying different variations of the command.
-
57Ssadd Function - Demo
We will use ssadd function in our code and see the changes in the selection set by adding items in it.
-
58Ssdel Function - Demo
We will learn and understand how ssdel works by deleting objects in the selection set.
-
59Ssmemb Function - Demo
We will have an example of ssmemb and see how it works in AutoCAD by checking whether an entity is a member of a selection set or not.
-
60Ssname Function - Demo
We will see how ssname works in our program and how to get the property of each object.
-
61Sslength Function - Demo
We will use sslength in the code and see how we can use it when getting the number of the objects in the selection set.
-
62Selection Sets - Exercises
In order to test your knowledge on the selection sets topic, try completing these exercises. This will help you better understand how each of the Selection Sets Functions work.
-
63Selection Sets - Solutions to Exercises
Let's compare your code to the solutions provided and see if you get all the exercises correct.
-
67AutoCAD Objects: Re-examined (Part 1)
We will explore the Line, Polyline, Circle, and Text Objects and see their respective object data model.
-
68AutoCAD Objects: Re-examined (Part 2)
We will examine the Dimension, Block and Attribute Objects and dig deeper on their data model and learn about the sub-entities.
-
69Line Object: Re-examined (Demo)
We will see the actual manipulation of Line Data Model by creating a program to change the starting point.
-
70Circle Object: Re-examined (Demo)
We will dig deeper into the Circle's Definition Data and create a program to manipulate the Radius.
-
71Text Object: Re-examined (Demo)
We will dig deeper into the Text Definition Data and create a program to manipulate the Text String, Layer and Style.
-
72Dimension Object: Re-examined (Demo)
We will dig deep and examine the Dimension Object's Definition Data and create a program to change the Dimension Style.
-
73Block/Attribute Object: Re-examined (Demo)
We will dig deeper into the Block and Attribute Sub Entities and create a program to update the attribute values for all the blocks in the drawing.
-
74Symbol Table and Dictionary-Handling Functions - Theory
TBLSEARCH, TBLNEXT and TBLOBJNAME Functions will be discussed.
-
75Tblsearch - Demo
We will create a program that uses the Tblsearch function that replaces the style of the Text.
-
76Tblnext - Demo
We will have a practical example showcasing the Tblnext function by going through the Layer database and display them all to the user.
-
77CDIM - Project
This function will check all the modified dimensions text and change them to red color.
-
78CHSTYLE - Project
This project will change the style of all the Texts in the drawing using most of the functions that we've learned from the previous videos and more.
-
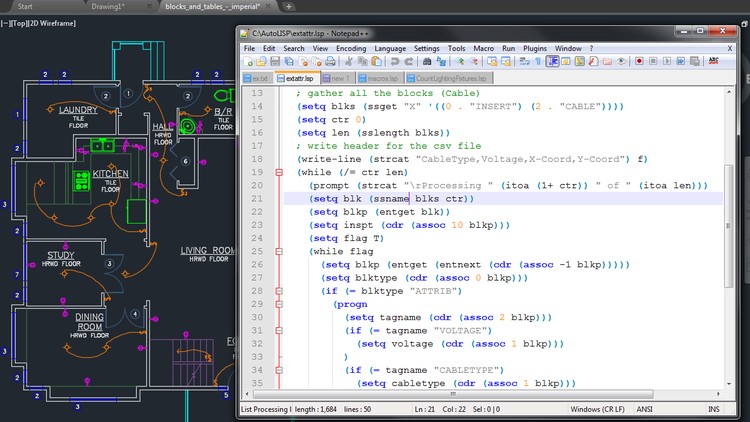
79EXTATTR - Hands-On Project
This project will extract all the attribute values into a csv formatted file.


Social Network