Learn Google SketchUp from Scratch
- Description
- Curriculum
- FAQ
- Reviews

This is the Google SketchUp course which is ideal for beginners who want to learn some 3d modelling skills. You do not need any software skills to learn working on Google SketchUp. You just need some imagination and your design will be ready in minutes.
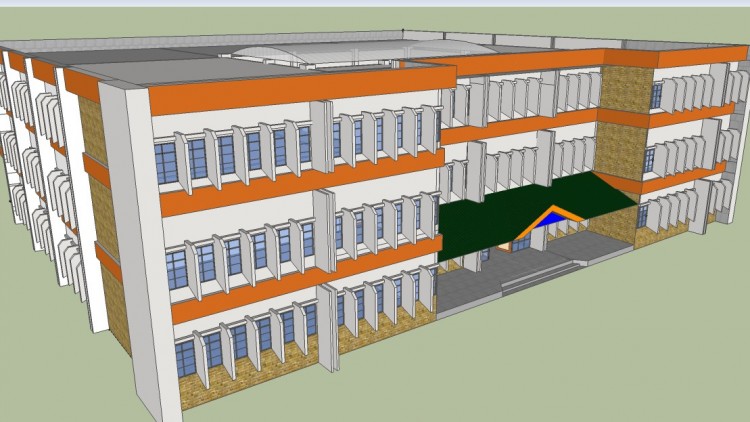
This is one of the basic and simplest software to start learning about 3d modelling. You can create chairs, tables, household items, vehicles, buildings and lot more.
For your college projects you might need to create computer models of your machines, apparatus, tools, lab instruments or you might need to display the complete architecture of your proposed model. Google SketchUp can be very handy in it.
In this course we will cover each and every step to keep you going further. We will learn about all the tools and options of the software beginning with the installation, of course.
Just hold my hand and I will feed everything to you.
-
1Introduction of Google Sketchup
This is the introductory video of our course module fundamentals of Google Sketchup, the very first video where we will look towards the importance and applications of this software. In this tutorial we will not actually interact with the interface of the software but we will set up our mentality towards learning this beautiful creation of Google. This video works as the small spark in dark deep well for those who don’t have already lighted lanterns with them. Rest of the videos will kindle all the lamps one by one and will light your surroundings in this software.
-
2Downloading and Installing the Software
There was a small conflict in our team over this video and the topic was, “Should we include this or just provide software from our website itself?”
Well keeping in mind the terms of Google, we can’t redistribute the software and conflict resolved as, “yes, we should include the video”. From this video you will get the download location of this software over the internet. You will learn a lot more things like plugins, editor, scripts etc. You will also be able to install this software over the windows machine properly, after watching this video. Those who already downloaded the software and know the installation process can skip this video and jump to the next one, although it is recommended to watch this video.
-
3Welcome to Sketchup
From this video you will actually start using this software. Although we will not start working in this video but we will cover an essential part of SketchUp. Here we will choose a template for workspace. The choice of the template depends on the type of work you wish to do and the units in which you want your measurements. After that we will look towards the interface of the software. As we will work in 3 dimensions, so knowledge of three axes is essential and that is covered here.
-
4Introduction of MenuBar and Options
Generally, the topmost part of the software contains a bar and some options listed over there like File, Edit, and other software specific options. We can call them menu items and the bar as menu bar. In this video we are going to cover that part.
There are a lot more things to learn in this video about the software. Most of the options in menu items are explained and their impact on the workspace and the models are shown here.
You can’t afford to leave this video.
-
5Let the Mechanic Use the Tools
This is the video in which you will learn about altering your point of view. We will cover the camera, draw and tools menu here. We can say that the last video and this one completes the menu bar discussion. This video will introduce you with the tools that we will cover separately in upcoming videos. Simply it will create the base for further learning.
-
6SketchUp Best Friends - Orbit, Pan, and Zoom
This video is full of small animations to show you shortcuts for orbit, pan and zoom through mouse and keyboard. Orbit, pan and zoom are the tools without which you can’t imagine to work smoothly on this software. They are the tools for changing your field of view. At every step of your modeling, you will need these three tools. You should spend some time practicing these tools before moving forward.
-
7Select Everything With Select Tool
This tutorial describes the working of Select tool. As its name indicates, it is used for selecting the entities. You can select single entity or a group of entities at once. Basically you can use either left drag or right drag to select a model. Once model get selected then you can move it, rotate it or edit it according to your desire. Generally nothing happens without selecting an entity. This video is all about it.
-
8Erase Your Defects With Eraser Tool
Nobody is perfect in this world. If we do something then there will be full chance of mistakes. Eraser is a tool which hides your mistakes. Sometimes eraser is used not to hide mistakes, but to hide the work which was done to support some required work. For example the outlines drawn by the artists to set a boundary for their work.Without eraser it would be very difficult to do things precisely. This tutorial teaches the right ways of using the eraser tool in Google SketchUp. Its a short video but contains a lot of information within it.
-
9Shape Your Imagination With Shapes and Line Tools
This video describes the working of 7 tools. In this tutorial we will learn about all the basic shape tools like rectangle, circle, line, polygon etc. We will also cover paint bucket tool in this video, Along with basic workings we will learn some tips and tricks related to these tools also.
-
102D was past, Its time for 3D. Its time for push pull tool
In this video we will cover a tool which has the ability to convert a 2D figure like rectangle into a 3D cuboid. We can extrude a plane surface with the help of this tool although it doesn’t work on curved surface. We will also learn some of the tips and tricks related to this tool. Working with this tool is very easy and requires only pushing and pulling.
-
11Lets Move Forward. Yes of Course, with Move Tool
In this tutorial we will learn working of move tool. This tool is used for displacing models from their place to some other location. Like previous videos, we will cover some tips and tricks related to move tool also.
-
12Round, Round, Round. Time For Rotation Tool
There are basically three transformation options –
- Translate
- Rotate
- Scale
In this video we will cover the rotation option. It also includes a small animation which can help us to grasp the working of this tool easily. Tips and tricks included.
-
13Follow me on the road of Google SketchUp
This video describes the working of Follow me tool of Google SketchUp. This tool is used for extruding a face around a given boundary. This video includes some of the examples which can give you an idea of how to work with it properly.
-
14Scale Your Ambitions, Here Comes Scale Tool
In previous videos, we cover two tools for transformation – Move tool for Translation and Rotate tool for rotation. In this video we will cover the third transformation tool – Scale tool. It includes working of scale tool on both 2d and 3D figure. Tips and tricks included.
-
15Simply, The Offset Tool
This video describes the offset tool of Google SketchUp. You will learn working and importance of this tool.
-
16Measurements In Your Pocket, Tape Measure Tool
In this video you will learn Tape Measure tool. Tape Measure tool is used to measure distances, create guide lines or points, or scale a model.
-
17Work Precisely With Dimension And Protractor
Without precision nobody can expect a good work. This video describes the Dimension and Protractor tool. Use the Dimension tool to place Dimension entities in your model. Use the Protractor tool to measure angles and create angled guide lines.
-
18Time For 3d Text, Text And Axes Tool
Use the Axes tool to move, or reorient, the drawing axes within your model. For example, you might want to move the axes when you are constructing rectangular objects that are skewed relative to one another. Or, you might use this tool to allow for more accurate scaling of objects that are not oriented along the default coordinate planes.
-
19More Left? Yes 4 More. Check Them Out
This tutorial describes the Walkthrough section of the Google SketchUp. Also we will cover one more tool – Section plane.
Walkthrough section contains three tools – Position Camera, Walk and Look Around.
Position Camera - Use the Position Camera tool to position the camera (your view) at a specific eye height so that you can check the line of sight of a model or walk through a model.
Look Around - Use the Look Around tool to pivot the camera (your view) around a stationary point. The Look Around tool behaves similarly to a person standing still while turning their head to up, down (tilt), and side to side (pan). The Look Around tool is particularly useful for viewing the inside of spaces, or to evaluate visibility after using the Position Camera tool.
Walk too - Use the Walk tool to maneuver through your SketchUp model as though you were walking through your model. Specifically, the Walk tool fixes the camera to a particular height, and then allows you to maneuver the camera around your model. The Walk tool is available only in Perspective mode.


Social Network