Learn Blender 3D Modeling for Unity Video Game Development
- Description
- Curriculum
- FAQ
- Reviews

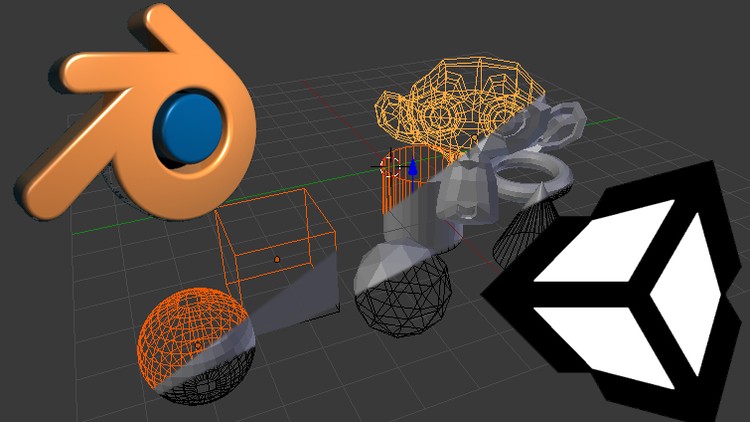
This course was designed for Unity developers who want to extend their capabilities to include 3D modeling in Blender. Whether you’re interested in designing unique 3D props for your games, building awesome levels, or tweaking your existing Unity Assets, this course can help you get through the learning curve and put you in the driver’s seat. You’ll learn to Blend like a pro with a good working knowledge of all of the most common tools for editing video game props and level design. We cover all the basic terms, keyboard shortcuts, best practices, time-saving tips, basic animation, assigning uvs, applying materials, textures and more.
-
1Introduction
How the course is outlined and what to expect in the coming sections
-
2Note to Mac Users
Just a quick note to mention that this course was not taught on a Mac. If you are using a Mac, you may need to substitute certain keys such as the Option key, which apparently is the Control key on Windows.
-
3Keyboards
This course is taught with the assumption that you will be using a standard keyboard with a numeric keypad. This lecture explains why.
-
4Mousewheel - 3-Button MouseNot all mice are created equally. Some only have one button, while others have many! This lecture will point out why having a 3-button mouse with a scroll wheel is considered a necessity for taking this course.
-
5Introduction to Blender: What You Will Need
What will you need to bring to class in order to learn from this Course?
-
6Moving Around in Blender
Learn how to maneuver in the Blender environment.
-
7Lamps and Cameras
Learn why I almost never use Lamps and Cameras in my Blender models
-
8(De)select All - Selecting and Unselecting Objects
Whether selecting individually or all at once, you'll learn different techniques for selecting objects in Blender.
-
9Add Mesh - Create New Objects
Learn how to add the primitive objects to your scene in Blender using the Add Mesh shortcut.
-
10Delete and Undo
Learn how to Delete objects and geometry, how to Undo and Redo. By the end of the lecture you should understand how to configure your Undo Buffer settings, and have more control over Undoing to recover from mistakes.
-
11Object and Edit Modes
Learn how to alternate between the various modes and understand how Blender chooses which two modes to toggle between.
-
12Grab Tool
Learn how to Grab an object without using the transform arrows. Also gain control over grabbing and moving objects with the mouse or numeric keypad.
-
13Review Basic Controls
Pop quiz covering the basic controls covered so far.
-
14Scale - Scaling, Sizing or Resizing an Object
Learn how to Scale (or resize) any object using the mouse, or by typing values typed manually on the numeric keypad.
-
15Extrude - Extruding or Extending an Object's Geometry
Learn how to Extrude (or extend) any object's shape using the mouse or by typing values manually using the numeric keypad.
-
16Rotation - How to Rotate Objects
Learn how to Rotate (or spin) an object on any axis (or pivot point) using the mouse or by typing values manually into the numeric keypad.
-
17Subdivide
Learn how to break down edges and faces into smaller sections using the Subdivide Tool.
-
18Dissolve Tool
Learn how to combine faces and edges while washing away unwanted geometry using the Dissolve Tool.
-
19Edge Loop Select
Select entire loops from any Edge using the Edge Loop Select option. Learn how to recognize loop patterns and make quick decisions for selecting geometry.
-
20Loop Cut and Slide
Learn how to cut edges into your geometry that can completely outline the object. Then choose to either slide, snap or center your cut into position!
-
21Loop Tools: Bridge (Add-On)
Learn how to activate a Blender Add-On and start using "Loop Tools" to "Bridge" two selected loops of geometry together.
-
22Midway Terminology Review
We're halfway through the Terminology Section. Here's a pop quiz to find out what you've learned so far.
-
23Knife Tool
Learn how to make cuts into the geometry of your object. Cut loosely, or snap to the center of any selected edge. Cut clean across any edge, face or even over the guideline itself. You can cut holes out of the center of faces, or make perfectly snapped incisions across faces or edges.
-
24Remove Doubles
Learn what "Removing Doubles" actually means, and why it's important to check in on them from time to time. You'll start to understand what doubles 'look' like, or how they can affect your work.
-
25Move To Layer - Moving Objects Between Layers
Learn how to develop using Layers. Now you can organize your Blender projects and turn layers on or off to show or hide entire sections of your work on the fly.
-
26Select Linked (More or Less)
Understand the difference between an object whose geometry is connected by linked vertices and one that is not. You'll learn how to select all of the linked geometry and keep things separated without having to split it into multiple objects. Or how to select linked geometry and separate it into another object (if you prefer)
-
27Origin and 3D Cursor
Learn the difference between the Origin and 3D Cursor, how to recognize them on sight, and understand what to do with each of these on-screen markers.
-
28Border and Lasso Select
Choose your selection tool... Are you a Border selector? or a Lasso Selector? Learn the difference between the two, and recognize when to use one versus the other.
-
29Join and Separate
Learn how to Join two or more objects together into one solid object. Then learn how to separate them again!
-
30Bevel Tool
Learn how to soften your edges using the Bevel tool.
-
31Simple Deform: Bend (Modifier) - Bending Objects
Learn how to bend the geometry of any object using the Simple Deform: Bend (Modifier). Whether you need to create a curvy/bendy series of pipes, a winding stretch of road, or some conduit for your technological level designs, this tool is sure to assist.
-
32Simple Deform: Bend (Issues)
This lecture addresses a common problem while using the Simple Deform: Bend Modifier Tool.
-
33Cell Fracture Tool
Learn how to smash objects into fragmented pieces with configuration options that can manage the crack margins, size and fracture randomness, and even the cracked surface materials!
-
34Boolean Modifiers
Learn how to cut the shape of one object out of another, or how to extend the shape of one object onto another. The Boolean Modifier's Difference and Union options can quickly splice and dice your objects up with mathematical precision.
-
35What is The Grid?
You hear it all the time, but do you actually know what it is? The Grid may sound like something out of The Matrix, but it happens to be one of the most important tools for both Blender and Unity. Learn how to use The Grid in your projects to improve productivity and give your finished models the precision geometry needed to keep everything snapped together at all times.
-
36Note About Snapping
Understand the importance of snapping to the grid and recognize when the instructor is doing so.
-
37Completed Terminology Review
You've completed the Terminology Section. Congrats! Let's find out how much you know about the various controls and terms used throughout this Course.
-
38TIP: Avoid Transform Resets
Here's a quick tip to help you avoid having to reset your Location or Rotation and Scale every time you turn around. While Resetting your Transforms is still something you'll want to keep an eye on, it's much easier if you develop an understanding of how the transform gets out of line in the first place. This lecture should clear things up a bit.
-
39Low-Poly 'Cartoony' Trees
This is the first actual model that we'll be making together. Whether you use these low-poly trees or not, this lecture includes a brief introduction to "Sculpt Mode" and gives some pointers for creating other objects with the Sculpting tools.
-
40Low-Poly 'Blocky' Characters
Although you may not end up using this model in any of your projects, it's a fun way to learn how to use some of the tools you've learned in the Terminology Section. This lecture is heavy on Extruding and Scaling, and helps identify how to map out a more complicated shape from a simple cube.
-
41Low-Poly 'Cartoony' House
In this lecture, we'll create an "Exterior Only" 3D House with a goal for low-poly design. The house features a separate rooftop, chimney, and simplified geometry for a door and window.
-
42Low-Poly 'Cartoony' House (Rooftop Issues)
This lecture addresses some issues that came up regarding the Low-Poly 'Cartoony' House's Rooftops. A few students were having some troubles with the Transform Orientations, and I thought it would be beneficial to them, and anyone else having similar issues to produce a lecture that helps understand and resolve those issues.
-
43Fences
In this lecture, we'll design a simple low-poly fence template, then snap it together and then learn to use the "Union" Boolean Modifier to piece together our finished sections of fence, one at a time.
-
44Bridge
Although still considered fairly low-poly, a bridge constructed in this manner could find it's way into just about any 3D environment. You'll learn how to create bridges like this from simple objects in minutes!
-
45Bridge Textures
This is our first lecture that focuses on applying Materials to our work. In this quick guide, you'll learn how to use Blender's "Cycles Render" along with the "Cube Projection" UV Mapping tool to quickly and easily apply material textures to your models.
-
46Crates
You'll learn a couple of techniques for crafting a classic shipping crate to add to your props collection. This lecture is heavy on using Extrude, Scale and Rotate along with the numeric keypad. I'll introduce the Merge at Center tool at some point in the tutorial too.
-
47Barrels
In this lecture, we'll create a classic wooden style Barrel to add to your props collection. The barrel features 3 strips of binding along the outside walls, and either closed or open configurations. Heavy on Extrude, Scale,and Loop Selections.
-
48Treasure Chest - Part I: Foundation
In this lecture, we'll create the bare bones foundation of a classic treasure-style chest with rounded top, and rectangular bottom. We'll use the "Difference" Boolean Modifier to cut pieces of geometry from primitive shapes to form the framework of our chest, and then separate everything into respective layers to keep everything organized and easier to manipulate.
-
49Treasure Chest: Quick Fix
In this lecture, I'll address a change to the Boolean Difference modifier which affects the ability to follow the instructions from the previous lecture. We'll discover another way to get the job done using the same tool, but with fewer steps.
-
50Treasure Chest - Part II: Hardware
This is the second part of our Chest lecture, where we will be adding some basic hardware to our bare bones foundation piece, including a very simple ring-shaped handle on the sides, and a locking ring on the front.The lecture makes use of the "Torus" (mesh object) and teaches how to Add Meshes at specific places in the world space using the 3D Cursor and various Origins throughout the geometry.
-
51Gravestones
You'll learn how to design your own tombstones! This lecture makes use of the "Difference" Boolean Modifier, the Bevel tool, as well as using Layers to perform a little side-work.
-
52Tables
In this lecture, we'll design 3 different tables. Two of which use a central column with either a square or circular structural foundation, and the other table demonstrates how to fashion 4 legs perfectly aligned and set into the corners.
-
53Chairs and Stools
We will design a 4-legged chair and a 3-legged stool to match the tables from the previous lecture.
-
54Clay Pottery
In this lecture, we'll create clay pots and jars with or without a handle. I'll introduce you briefly to the "Loop Tools: Bridge" modifier.
-
55Clay Pottery Tip - Solidify (Modifier)
This lesson will walk you through the process of using the 'Solidify' Modifier to help shape the interior walls of your clay pottery.
-
56Smashed Pottery
We'll use the Cell Fracture tool to smash our clay pots and jars into fragmented bits.
-
57Support Beams
This lecture demonstrates good practical use of resetting the Location to force pivot points, making it easy to create support beams that can be used for Modular Level Design. We'll make a very simple set of support beams, consisting of 3 individually placed wooden boards that can be rotated in any direction and snapped together to form the framework of a support beam system.
-
58Modular Pipes
In this lecture, we'll create 2 segments of pipes using the Simple Deform: Bend Modifier. By the end of the lecture, you'll have a good understanding of how to use this tool to create a wide variety of twisty, bendy, curvy objects.
-
59Stairs: Vector Snapping
This lecture reveals perhaps the simplest method for creating stairs for your levels. We'll start by converting a cube to a ramp, and then quickly subdividing the ramp into stairs using the Vertex Snapping tool and a simple mathematical formula. Create any proportion with any number of stairs in just a few clicks.
-
60Stairs: Array Modifier
In this lecture, you'll learn how to use the Array Modifier to produce a more complex set of stairs. Choose any number of steps, set your steps apart any distance, and do all of your editing on only one step. The modifier takes care of the rest.
-
61Stair Colliders
In this lecture, I'll point out some helpful tips to get your character controllers moving smoothly up and own your custom staircases.
-
62Props Review
Pop quiz to review what you have learned about making Props in Blender.
-
63Level Design: Interiors
Learn the difference between creating modular tiles to develop a variety of room layouts vs using prefabricated rooms built for randomized dungeons.
-
64Level Design: Caves
Take the previous lecture to the next level by designing Interior Rooms and then converting them into an expansive network of naturally carved Caves!
-
65Blocked Doorways
In this lecture, we'll explore how to use Blocked Doorways to prevent players from discovering void space in your level designs.
-
66Walls, Windows and Doorways
This lecture focuses on Interior AND Exterior Modular Level Design. We'll learn how to create modular walls, windows and doorways and snap them together faster than you can even draw it out on paper.
-
67Floors: Planes vs Platforms
When designing your Interior/Exterior Modular Levels, you'll need to consider using 3D Platforms instead of 2D Planes for your ground level flooring. This lecture demonstrates a few ideas to get you started with flooring your own levels.
-
68Modular Rooftops: Tour
Take a tour as we look at different methods for adding Rooftops to your Interior/Exterior Modular Level Designs. I'll show you how to snap levels together quickly that include finished rooftops. We'll take a peak at some of my own rooftops, and go over the basic principals of the creation process.
-
69Modular Level Design Review
Pop quiz to see how much you have learned about designing modular levels for Unity.
-
70Boneless Animations
Learn how to animate single objects without any bones or rigging.
-
71Treasure Chest - Part III: Animation
In this lecture, we'll take the chest that we created earlier in the course, and design an open/close animation loop that you can use in your own games.
-
72Levers and Switches
In this lecture, we'll continue exploring more Boneless Animation techniques by animating a 3-position Floor Lever and bringing it into Unity to see how it works.
-
73Trap: Floor Spikes
Learn how to design and animate a spiked floor trap without any bones or rigging.
-
74Door Animation(s)
Learn how to create a door animation loop and see it working in an actual Unity project.
-
75Lifts: Elevator and Moving Platform
We'll explore more Boneless Animations. This time, we'll create 2 different animations applied to two completely different kinds of objects. (An elevator and a moving platform) We'll import/export ALL of the animation data through one FBX file, import/export all objects from the scene (including the elevator and moving platform) as a separate fbx file (without animations), and then animate both elevator and moving platform from the animation file import.
-
76Animation Events
In this lecture, I'll demonstrate how to play an audio clip when a specific keyframe is reached during an animation sequence. I'll reveal how to use the Animation Event (Trigger) to perform just about any action you can imagine (C# Scripting Knowledge Required)
-
77Review Boneless Animations
Pop quiz to find out what you have learned about using Blender to Animate (without Rigging or setting up any Bones) for Unity game development.
-
78Textures vs Colors
Learn how to apply colors and textures to your 3D models. Reduce, Reuse, and Recycle your materials. Learn to conserve precious memory in Unity by reducing the number of materials that need to load into memory at run time.
-
79Seamless Textures
Learn more about Seamless Textures, when and when not to use them, and more.
-
80Understanding UV Mapping
In this lecture, we'll take a closer look at UV Mapping and start to understand what it is, and how it can help improve your work.
-
81Unwrapping Cubes
This lecture focuses specifically on UV Mapping (or Unwrapping) a Cube.
-
82Unwrapping Cylinders
This lecture focuses specifically on UV Mapping (or Unwrapping) a Cylinder
-
83Unwrapping SpheresThis lecture focuses specifically on UV Mapping (or Unwrapping) a Sphere
-
84Apply Textures in Unity
Learn how to Import your Textured Blender Model into Unity where you can reassign the same textures quickly and easily. As a little bonus, I also show you how to create a simple "Normals Map" using Photoshop and Unity 5.
-
85Ambient Occlusion
Learn how Ambient Occlusion can really make your finished model stand out. This video clearly demonstrates the difference between a model that has been Ambient Occluded, and one that has not. Learn how to apply your own Ambient Occlusion using a UV Layer and ordinary image editing tools. (NOTE: I use Photoshop to demonstrate this procedure, though any image editor could do the same)
-
86UV Mapping and Materials Review
Pop quiz to find out what you have learned about applying Textures and Materials, and setting up UVs for Texture Mapping


Social Network